-
Accounting Codes/Leave
-
Accounting/Admin Role
-
Accounting/Codes
-
Accounting/Leave Request
-
Announcements
-
Custom
-
Custom
-
Dashboard
-
Employee Role Related
-
Employees
-
Export
-
Exporting Data
-
Frequently Asked Questions
-
General Setup Instructions
- Billable vs Non Billable
- Creating Groups
- Employee Authorized Charge Code Associations
- Manage Charge Codes (Non QuickBooks)
- Manage Charge Codes (QuickBooks)
- New Site Setup Steps
- Overtime Rules
- Setting up and Defining System Roles
- Setting up leave in Hour Timesheet
- Setup Guide For Stand Alone Accounts
- Smart Phone App
- Step 1. Setup Leave Types
-
Groups
-
Importing Data
-
Misc
-
Mobile App
-
My Timesheet
-
Options to Capture Employee Time
-
Payroll
-
QuickBooks Desktop
-
QuickBooks Desktop
-
QuickBooks Desktop
-
QuickBooks Online
-
QuickBooks Online
-
QuickBooks Online
-
Reports
-
Reports
-
Request Leave
-
Run Payroll
-
Run Payroll
-
Schedule
-
Schedules
-
Settings Menu
-
Supervisor Reports
-
Timesheet Review
-
Timesheet Review
Adding Customers and Service Items to Leave Items for QuickBooks Export
For clients who want to associate Customer/Jobs and Service Items from QB to Hour Timesheet Leave Payroll Items. Follow the instructions below while logged in to your Hour Timesheet account as an administrator.
Step 1. Navigate to the Settings/Timesheet page and place a checkmark in the Timesheet Business Rules labeled “Track and export leave hours against charge codes” checkbox.

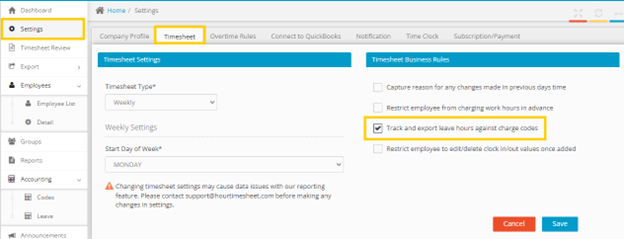
Figure 1 Assign Business Rule Setting
Step 2. Navigate to the Accounting/Leave and assign the required leave to the employees.

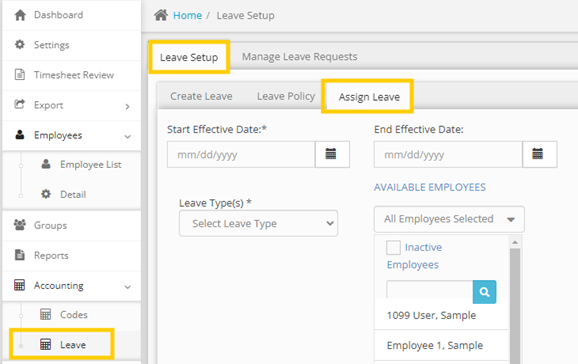
Figure 2 Assign Leave to Employee
Step 3. Navigate to the Accounting/Codes page and assign the charge code to the employee that includes the full mapping of the Customer/Job <-> Service Item <-> Leave Pay Type.

Figure 3 Assign Leave Charge Codes to Employee