-
Accounting Codes/Leave
-
Accounting/Admin Role
-
Accounting/Codes
-
Accounting/Leave Request
-
Announcements
-
Custom
-
Custom
-
Dashboard
-
Employee Role Related
-
Employees
-
Export
-
Exporting Data
-
Frequently Asked Questions
-
General Setup Instructions
- Billable vs Non Billable
- Creating Groups
- Employee Authorized Charge Code Associations
- Manage Charge Codes (Non QuickBooks)
- Manage Charge Codes (QuickBooks)
- New Site Setup Steps
- Overtime Rules
- Setting up and Defining System Roles
- Setting up leave in Hour Timesheet
- Setup Guide For Stand Alone Accounts
- Smart Phone App
- Step 1. Setup Leave Types
-
Groups
-
Importing Data
-
Misc
-
Mobile App
-
My Timesheet
-
Options to Capture Employee Time
-
Payroll
-
QuickBooks Desktop
-
QuickBooks Desktop
-
QuickBooks Desktop
-
QuickBooks Online
-
QuickBooks Online
-
QuickBooks Online
-
Reports
-
Reports
-
Request Leave
-
Run Payroll
-
Run Payroll
-
Schedule
-
Schedules
-
Settings Menu
-
Supervisor Reports
-
Timesheet Review
-
Timesheet Review
Announcements
Creating Hour Timesheet Announcements
Access to Feature
Users with the following roles in Hour Timesheet will have access to the Announcements feature. This section displays announcements created using the Hour Timesheet Dashboard. The Hour Timesheet Dashboard is a simple way to communicate company specific information to your employees and contractors.
Supervisor
Admin

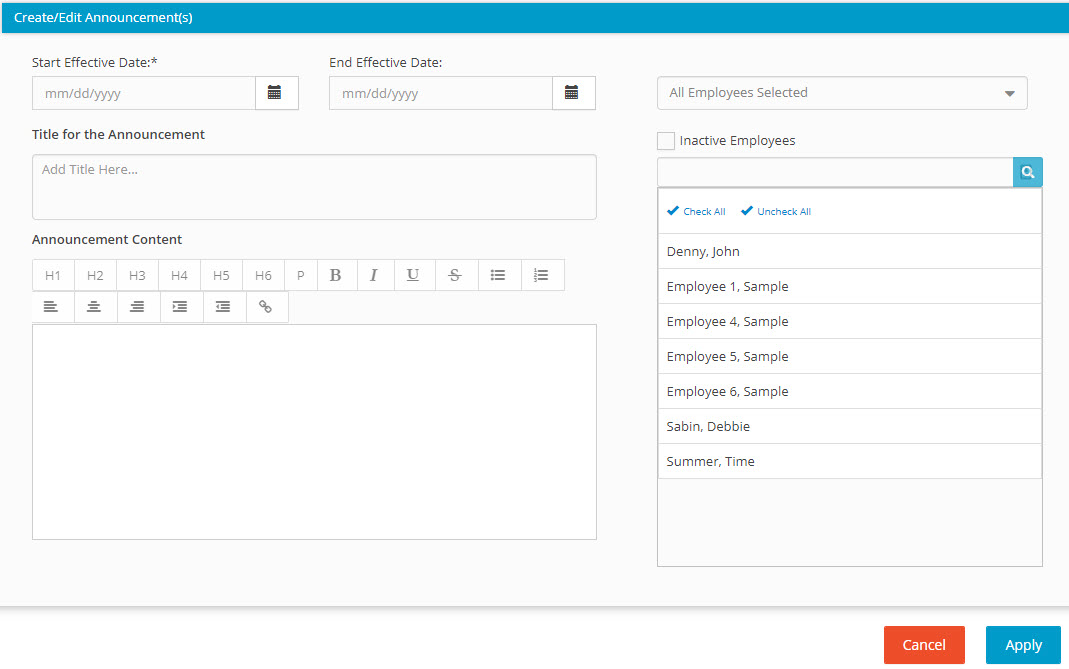
Create A new Announcement
1. To create a new announcement. Follow the steps below
2. Navigate to the Announcement menu
3. Enter the following information in the Create/Edit Announcement(s) form
4. Start Date
5. End Date
6. Title for Announcement
7. Announcement Content
8. Select from the list of Available Employees
9. Click Apply
Edit an Announcements
1. Once announcements are saved. The content can be edited by following the steps below.
2. Click the announcement to be edited
3. Click the Edit Announcement link
4. Update content
5. Click Apply