-
Accounting Codes/Leave
-
Accounting/Admin Role
-
Accounting/Codes
-
Accounting/Leave Request
-
Announcements
-
Custom
-
Custom
-
Dashboard
-
Employee Role Related
-
Employees
-
Export
-
Exporting Data
-
Frequently Asked Questions
-
General Setup Instructions
- Billable vs Non Billable
- Creating Groups
- Employee Authorized Charge Code Associations
- Manage Charge Codes (Non QuickBooks)
- Manage Charge Codes (QuickBooks)
- New Site Setup Steps
- Overtime Rules
- Setting up and Defining System Roles
- Setting up leave in Hour Timesheet
- Setup Guide For Stand Alone Accounts
- Smart Phone App
- Step 1. Setup Leave Types
-
Groups
-
Importing Data
-
Misc
-
Mobile App
-
My Timesheet
-
Options to Capture Employee Time
-
Payroll
-
QuickBooks Desktop
-
QuickBooks Desktop
-
QuickBooks Desktop
-
QuickBooks Online
-
QuickBooks Online
-
QuickBooks Online
-
Reports
-
Reports
-
Request Leave
-
Run Payroll
-
Run Payroll
-
Schedule
-
Schedules
-
Settings Menu
-
Supervisor Reports
-
Timesheet Review
-
Timesheet Review
Employee Details
Employee Detail
Detail : Manage Authorized Charges
The employee detail page displays the charge code associations for each timesheet user (which limit what each user can charge to when entering hours on a timesheet).
To remove a code from the user’s timesheet, click the pencil icon and enter an end date prior to the current period.

Detail : Manage Leave
This page displays the leave associations and balances for each end user. Associated leave types are required so that the timesheet can select “Add Leave Hours” from the timesheet. If Hour Timesheet is managing leave for your workforce, balances can be adjusted using the edit icon.

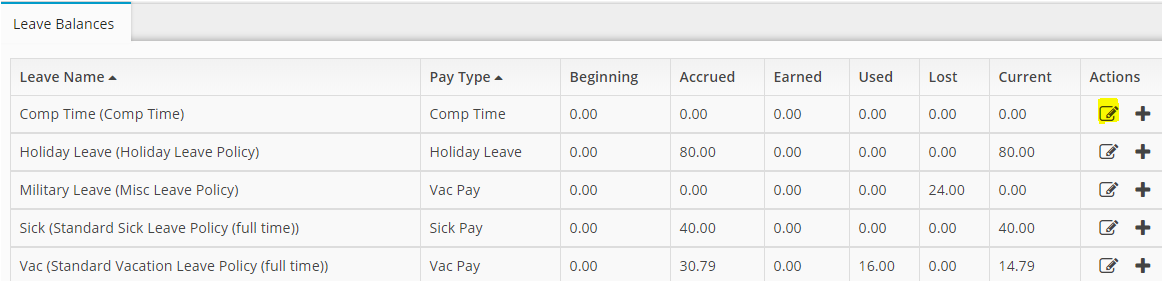
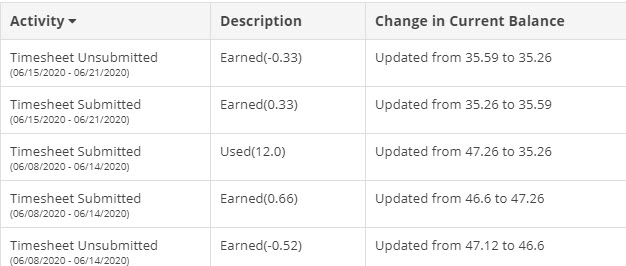
Leave Audit Trail Log
The leave log can be viewed by clicking the + in the actions column. This log will show each change in the employee’s leave balance.

Detail : Manage Overtime Rules
This page displays the overtime rules assigned to each employee. To assign overtime rules to each user, you will need to navigate to the Settings/Overtime Rules menu.
