-
Accounting Codes/Leave
-
Accounting/Admin Role
-
Accounting/Codes
-
Accounting/Leave Request
-
Announcements
-
Custom
-
Custom
-
Dashboard
-
Employee Role Related
-
Employees
-
Export
-
Exporting Data
-
Frequently Asked Questions
-
General Setup Instructions
- Billable vs Non Billable
- Creating Groups
- Employee Authorized Charge Code Associations
- Manage Charge Codes (Non QuickBooks)
- Manage Charge Codes (QuickBooks)
- New Site Setup Steps
- Overtime Rules
- Setting up and Defining System Roles
- Setting up leave in Hour Timesheet
- Setup Guide For Stand Alone Accounts
- Smart Phone App
- Step 1. Setup Leave Types
-
Groups
-
Importing Data
-
Misc
-
Mobile App
-
My Timesheet
-
Options to Capture Employee Time
-
Payroll
-
QuickBooks Desktop
-
QuickBooks Desktop
-
QuickBooks Desktop
-
QuickBooks Online
-
QuickBooks Online
-
QuickBooks Online
-
Reports
-
Reports
-
Request Leave
-
Run Payroll
-
Run Payroll
-
Schedule
-
Schedules
-
Settings Menu
-
Supervisor Reports
-
Timesheet Review
-
Timesheet Review
Step 1. Setup Leave Types
Leave Types in Hour Timesheet represent specific categories of paid or unpaid time off that employees can request and track—such as Sick Leave, Vacation, Personal Time, or Jury Duty.
Each Leave Type is associated with a leave-related payroll item or service item imported from QuickBooks or entered manually in an HTS Stand-alone account.
Once configured, Leave Types appear as selectable options on employee timesheets, allowing users to log time off accurately.
How to Set Up Leave Types
1. Login to Hour Timesheet as Admin or Accountant role.
2. Navigate to Accounting→ Leave sub menu.
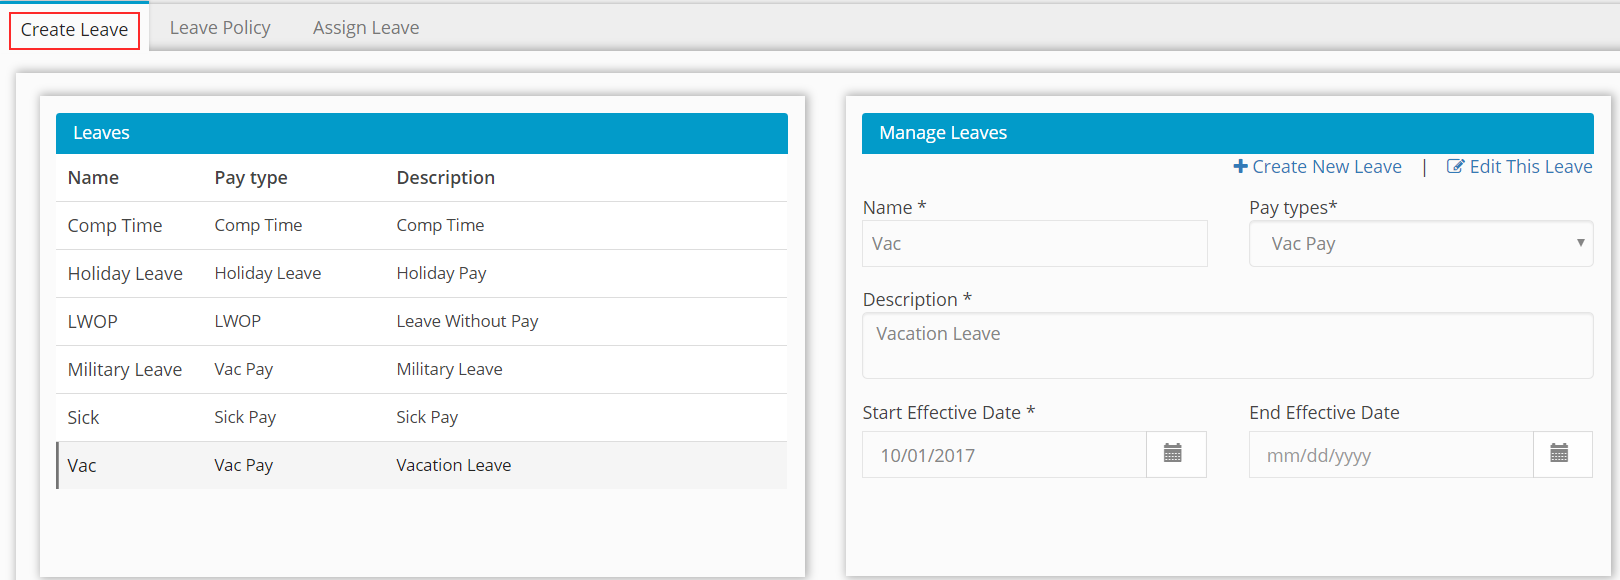
3. Click Create New Leave.
4. Enter Leave Name. (Sample: Sick Leave Pay)
5. Select Pay Type or Service Item from drop down box. (Sample: Sick Leave)
6. Enter Leave Description. (Sample: Sick Leave Pay)
7. Enter Start Effective Date of new leave type. (Sample: 01/01/2018)
8. Click the Save button to complete.
9. Repeat steps 1-8 above for each leave type.
