Have a Question?
-
Accounting Codes/Leave
-
Accounting/Admin Role
-
Accounting/Codes
-
Accounting/Leave Request
-
Announcements
-
Custom
-
Custom
-
Dashboard
-
Employee Role Related
-
Employees
-
Export
-
Exporting Data
-
Frequently Asked Questions
-
General Setup Instructions
- Billable vs Non Billable
- Creating Groups
- Employee Authorized Charge Code Associations
- Manage Charge Codes (Non QuickBooks)
- Manage Charge Codes (QuickBooks)
- New Site Setup Steps
- Overtime Rules
- Setting up and Defining System Roles
- Setting up leave in Hour Timesheet
- Setup Guide For Stand Alone Accounts
- Smart Phone App
- Step 1. Setup Leave Types
-
Groups
-
Importing Data
-
Misc
-
Mobile App
-
My Timesheet
-
Options to Capture Employee Time
-
Payroll
-
QuickBooks Desktop
-
QuickBooks Desktop
-
QuickBooks Desktop
-
QuickBooks Online
-
QuickBooks Online
-
QuickBooks Online
-
Reports
-
Reports
-
Request Leave
-
Run Payroll
-
Run Payroll
-
Schedule
-
Schedules
-
Settings Menu
-
Supervisor Reports
-
Timesheet Review
-
Timesheet Review
< All Topics
Print
Manage Leave Request
Posted
Updated
ByDebbie Sabin
Manage Leave Request
Approve/Reject Employee Leave Request
1. Login to Hour Timesheet
2. Navigate to Accounting/Leave menu
3. Click the Leave Request tab
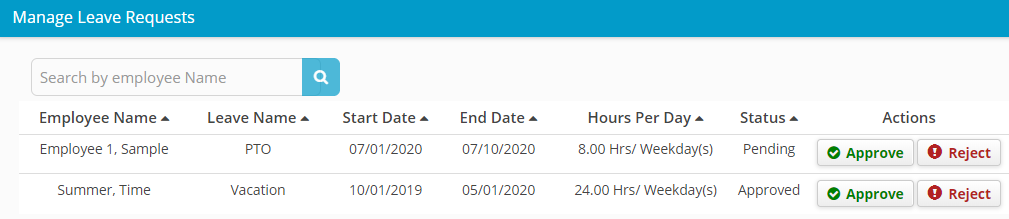
4. Update the Date Selection field to the appropriate dates (can be multiple months, but default is current month)
5. Click Approve to notify that employee leave request has been “approved”
6. Click Reject to notify that employee leave request has been “rejected”

Table of Contents