Have a Question?
-
Accounting Codes/Leave
-
Accounting/Admin Role
-
Accounting/Codes
-
Accounting/Leave Request
-
Announcements
-
Custom
-
Custom
-
Dashboard
-
Employee Role Related
-
Employees
-
Export
-
Exporting Data
-
Frequently Asked Questions
-
General Setup Instructions
- Billable vs Non Billable
- Creating Groups
- Employee Authorized Charge Code Associations
- Manage Charge Codes (Non QuickBooks)
- Manage Charge Codes (QuickBooks)
- New Site Setup Steps
- Overtime Rules
- Setting up and Defining System Roles
- Setting up leave in Hour Timesheet
- Setup Guide For Stand Alone Accounts
- Smart Phone App
- Step 1. Setup Leave Types
-
Groups
-
Importing Data
-
Misc
-
Mobile App
-
My Timesheet
-
Options to Capture Employee Time
-
Payroll
-
QuickBooks Desktop
-
QuickBooks Desktop
-
QuickBooks Desktop
-
QuickBooks Online
-
QuickBooks Online
-
QuickBooks Online
-
Reports
-
Reports
-
Request Leave
-
Run Payroll
-
Run Payroll
-
Schedule
-
Schedules
-
Settings Menu
-
Supervisor Reports
-
Timesheet Review
-
Timesheet Review
< All Topics
Print
Web Connector Troubleshooting Guide
Posted
Updated
ByDebbie Sabin
Web Connector Troubleshooting Guide
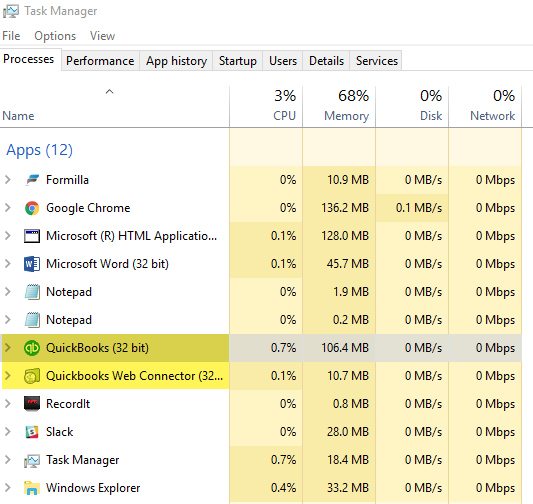
STEP A. End all background processes related to QuickBooks using Task Manager.
- QuickBooks (Right click – End Task)
- Web Connector (Right click – End Task)

Step B. Delete Existing Web Connector File from Computer Using Registry Editor
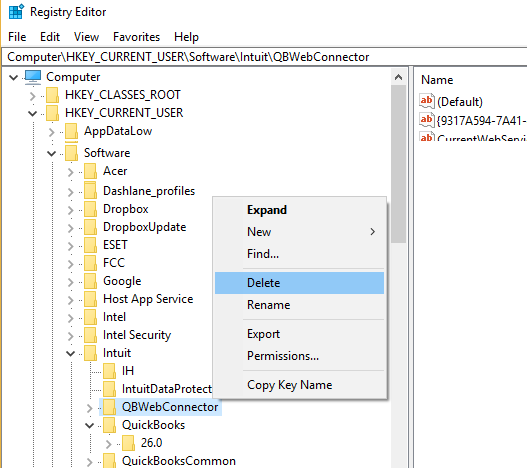
- In Windows, enter “regedit” in the Windows search
- Expand the tree in this order [HKEY_CURRENT_USERSoftwareIntuitQBWebConnector].
- Right click QBWebConnector, click Delete

Step C. Set QuickBooks and related files to run as Administrator
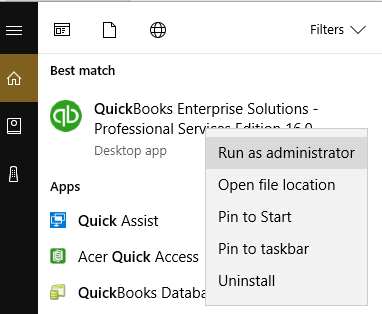
- In Windows, search for Web Connector, right click, check “Run as administrator”.
- In Windows, search for QuickBooks, right click, check” Run as administrator”

Step D. Set HTS QuickBooks Integration file to run as administrator
- Right click on HTS QuickBooks Integration icon from your desktop
- Click properties
- Click the Compatibility tab and check that option “Run this program as administrator”

Step E. Run the HTS QuickBooks Integration file (double click on desktop icon) from #4 above. When you see the screenshot below, make sure you change the selected option to the one highlighted below.

Step F. From your browser, login to your account of Hour Timesheet (URL used in signup process.
- Navigate to the Setting Menu
- Click the Connect to QuickBooks tab. You should now see a green text that states “Connected”
Table of Contents